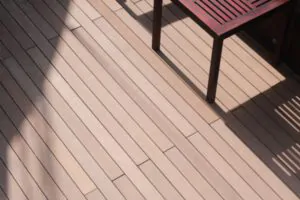
Staining a deck is like giving your outdoor space a new life. This process involves applying a layer of protective color to the wood, making it look better and last longer against weather damage.
A deck that’s well-stained not only stands up to rain and sun but also adds beauty to your home’s exterior. The steps for staining a deck might seem straightforward – clear the area, clean the wood and then apply stain with tools like brushes or sprayers.
Yet, doing it right requires some know-how.
Before grabbing that brush, you need to prepare by cleaning the surface thoroughly which may include getting rid of dirt and possibly sanding down rough patches. This ensures the stain goes on smoothly and sticks well.
Next comes choosing your weapons – high-quality stains applied with reliable applicators ensure your effort lasts through the seasons. You’ll protect nearby plants and parts of your house from splashes with tape and covers while tackling this task.
From railings to boards then stairs, method matters as much as material choice—certain areas need attention first to avoid drips ruining freshly stained surfaces below them. And let’s talk timing; too hot or about-to-rain just won’t do if you want those layers drying properly between coats.
This guide walks you through each step from preparation through those finishing touches with practical advice so you can achieve professional-looking results without forgetting key moves like checking weather forecasts or picking the right type of stain for your wood.
Read on for all the tips you need!
Key Takeaways
- Before staining your deck, it’s essential to check the weather forecast to ensure optimal conditions for application and drying.
- Choosing the right tools, like a quality deck brush applicator, is crucial for evenly applying stain and achieving a professional finish.
- Preparing the deck surface properly by cleaning and sanding ensures better stain adhesion and longevity.
- Applying multiple thin coats of stain instead of one thick coat helps prevent peeling and fading over time.
- Protect surrounding areas with plastic sheeting or drop cloths before starting your staining project to avoid damage.
Materials Needed for Staining a Deck
To stain a deck properly, you will need the essential materials. These include a deck stain bucket, a deck brush applicator, and a quality stain. Each of these items plays a crucial role in achieving professional-level results for your deck staining project.
Deck Stain Bucket
A deck stain container is essential for your project. Before applying, always shake or stir the stain inside this container to ensure it mixes well. This step helps prevent color inconsistencies on your wooden surfaces.
Proper mixing leads to a better-looking finish.
Next, choose either a pad applicator or a bristle tool for an even application across the planks and railings of your outdoor space. Moving on smoothly transitions us towards understanding the importance of selecting a high-quality mixture for your decking project.
Deck Brush Applicator
Choosing the right tools for deck staining makes a big difference in the final look and longevity of your work. A quality brush is essential, with experts often recommending a three-inch brush for working on floorboards.
This size strikes the perfect balance between control and coverage, making it easier to apply stain evenly across each board. For broader sections, a large paintbrush ensures uniform coverage while smaller brushes tackle those tricky spots around edges and in tight corners.
Cleaning your tools after use is just as crucial. Brushes and trays should be thoroughly cleaned to remove all traces of wood stain, then left to dry for 24 to 48 hours. Keeping your equipment in top condition means you’re always ready for touch-ups or new projects without last-minute rushes to replace worn-out tools.
With meticulous attention to selecting and maintaining the right applicator, achieving a professional-quality finish on your deck becomes much simpler.
Quality Stain
After choosing the right deck brush applicator, the next step is to select a quality stain. This part is crucial for ensuring your deck not only looks great but also withstands time and weather.
A high-quality stain offers a non-slip surface that’s both strong and durable. In my own experience, applying two to three coats of this kind of stain has made decks last longer without peeling or fading.
Using such stains also helps prevent water from seeping into your wood decking. This way, small checking cracks are less likely to form, keeping the integrity of your deck intact. From pressure-treated lumber to hardwoods, a good stain will protect and enhance the natural beauty of your wood while offering long-lasting protection.
Proper Preparation for Staining
Proper preparation for staining your deck is crucial to ensure a successful and long-lasting finish. This involves clearing and sweeping the deck, using a quality wood cleaner, as well as protecting surrounding areas from potential damage.
After all, these steps will set the stage for a smooth and professional-looking result that you can enjoy for years to come.
Clearing and sweeping the deck
Before starting the staining process, it’s crucial to clear and sweep the deck thoroughly. Remove any leaves, dirt, or debris using a broom to ensure a clean surface for staining. This step helps in creating an even application and improves the adherence of the stain.
Additionally, sweeping off loose debris prevents it from getting trapped under the stain which could affect its appearance and durability.
After clearing off larger debris with a broom, use a leaf blower to remove finer particles like dust or small twigs on the deck’s surface. Clearing and sweeping are essential initial steps before applying any preparations or products necessary for staining.
Cleaning with a deck cleaner and brightener
Before staining your deck, it’s crucial to prepare the wood properly. Use a deck cleaner and brightener to eliminate dirt, mildew, and old sealers. Start by wetting the deck with water before applying the cleaner.
Dilute the cleaner according to the manufacturer’s guidelines and scrub it into the wood using a brush or mop. Then rinse off any residue before proceeding with staining.
Properly cleaning your deck with a quality cleaner and brightener sets the stage for successful staining while ensuring even application of stain across all areas of your deck.
Protecting surrounding areas
Before applying any deck cleaner or stain, it’s crucial to protect the surrounding areas. Start by wetting nearby walls and cover any plants or vegetation with plastic sheeting. This prevents accidental damage from splashes and oversprays.
Additionally, use painter’s tape to shield walls, door frames, and other surfaces adjacent to the deck to maintain a clean finish without unwanted staining.
Steps for Staining a Deck
Staining a deck involves several sequential steps. First, start by staining the railings and any raised features before moving onto the deck boards, then proceed to stain the stairs and apply multiple coats for the best results.
To find out more about each step in detail, continue reading.
Staining the railings and raised features first
Begin by preparing the necessary materials for staining, such as a deck brush applicator and quality stain. Clear the deck of any debris and sweep it clean before washing with a deck cleaner and brightener to achieve the best results.
Protect nearby areas from potential drips or spills before starting with railings, using a roller to apply the stain evenly. Place a heavy drop cloth under the rails to capture any accidental drips that may occur onto the wood below.
Moving on, proceed to complete these steps for staining your entire deck in an organized manner while diligently following all safety precautions.
Staining the deck boards
Staining the deck boards requires careful attention to detail. Begin by ensuring that the boards are clean and dry. Use a brush or roller to apply the stain, working in small sections to avoid uneven application.
Apply thin coats for better results, allowing each coat to dry completely before applying the next one.
Once you have finished staining, inspect your work for any missed spots or uneven areas. Touch up as needed, and allow the stain to fully cure before moving furniture back onto the deck.
Staining the stairs
Staining the stairs is a crucial part of the deck staining process, ensuring that every element of your outdoor space complements each other. The steps involve cleaning the stairs thoroughly to allow for proper stain absorption and then applying an even coat of stain to match the rest of the deck’s color.
This meticulous approach helps in achieving a cohesive and professional finish, enhancing both the aesthetics and longevity of your entire deck structure.
Properly stained stairs complete the overall look of your deck, creating an inviting outdoor environment for guests or potential clients visiting your custom-built decks. Once you’ve completed this step, it’s time to explore how multiple coats can further protect these surfaces from wear and tear over time.
Applying multiple coats for best results
For the best results, apply two coats of stain to your deck. Start by evenly applying the first coat using a brush or roller, ensuring thorough coverage. After allowing it to dry completely according to the manufacturer’s instructions, follow up with a second coat in the same manner.
Applying multiple thin coats enhances protection and durability against weathering and foot traffic.
It is advisable to allow sufficient time for each coat to dry before applying another one, promoting even absorption and optimal adhesion. This approach helps ensure a professional-grade finish that preserves your deck for an extended period while also enhancing its visual appeal.
Expert Tips for Staining a Deck
When checking the forecast, be sure to plan to stain your deck when conditions are optimal. Proper surface preparation is key for a successful staining job. It’s crucial to use the right brushes for even application of the stain.
Choose the right type of stain based on your deck’s wood and the desired finish, and apply thin coats for the best results.
Checking the forecast
Before staining your deck, it’s crucial to check the weather forecast. The success of your staining project greatly depends on favorable weather conditions. Avoid staining in cold temperatures as this can compromise the adhesion process.
Additionally, direct sunlight should be avoided when applying stain to ensure optimal results, and most finishes require a 24-hour curing period before exposure to rain. Weather plays a critical role in determining the success or failure of your deck staining project.
Ensure you consult an accurate and up-to-date weather report before beginning any staining work on your deck.
Proper surface preparation
Start by clearing and sweeping the deck to remove any debris or dirt. After that, clean the surface using a deck cleaner and brightener to ensure all stains are removed. Protect surrounding areas with plastic sheeting or drop cloths to avoid any potential damage from cleaning agents or sanding dust.
Remember to wear protective gloves and goggles when working with chemicals. Sand splintered spots and smooth the deck surface with 80-grit sandpaper for an even finish.
Once everything is prepped, it’s time for staining!
Using the right brushes
Select synthetic brushes for applying water-based stain to your deck, as they effectively work the stain into the wood. Avoid natural bristle brushes when using water-based stain. Opt for a deck brush over a lambswool applicator or paint roller; it provides better coverage and penetration.
Incorporating a broad paintbrush ensures even coverage over large areas, while a smaller brush is indispensable for accessing tight spots and corners, ensuring every part of your deck receives an even coat of stain.
Incorporating these tips will result in well-stained decks that are not only visually appealing but also properly protected from the elements.
Choosing the right type of stain
When selecting the right type of stain for your deck, it’s crucial to match the stain with the wood type. Each wood type requires a specific stain category: transparent, semi-transparent, or solid.
Transparent stains work best for new wood that is in good condition and still shows its natural beauty. Semi-transparent stains provide moderate pigment while allowing some grain and texture to show through, ideal for slightly weathered woods.
On the other hand, solid stains offer maximum protection and are suitable for heavily weathered or aged wood.
Applying thin coats for better results
To ensure a professional-grade finish, applying thin coats of deck stain is crucial. This process prevents the formation of puddles and promotes even coverage. Moreover, it reduces the risk of peeling and fading over time for a longer-lasting protective layer.
By carefully applying 2 or 3 thin coats instead of thick ones, you can significantly enhance the appearance and durability of your deck while preserving its natural beauty.
It’s important to note that solid stains require thin coats as well, while semi-transparent stains or clear sealers should be applied in even thinner layers to avoid any issues with pooling.
Conclusion
Staining a deck properly is essential for ensuring its longevity and maintaining its appeal. By following the step-by-step guide, deck owners can achieve professional-level results, providing long-lasting protection against the elements.
It’s crucial to start with proper preparation by clearing and cleaning the deck surface thoroughly before applying multiple coats of quality stain. Utilizing expert tips such as checking the forecast and using the right brushes will help ensure a smooth and effective staining process.
With careful planning and attention to detail, anyone can successfully stain their deck like a pro.
FAQs
1. What tools do I need to prepare my deck for staining?
You will need a pressure washer or power washer to clean the surface, along with a scrub brush for tough spots. For sanding the wood, have some sandpaper or a power sander ready.
2. How do I choose the right stain for my deck?
Look at consumer reports and inventory of available wood stains carefully. Consider factors like your deck’s material and whether you prefer a transparent or solid finish.
3. Can I use a paint sprayer to apply stain on my deck?
Yes, you can use a paint sprayer to apply the stain evenly across your deck. It’s faster than brushing but make sure you cover areas you don’t want stained.
4. Is it necessary to pressure wash my deck before staining?
Absolutely! Pressure washing removes dirt, grime, and old stain particles, ensuring the new stain adheres properly and lasts longer.
5. What safety precautions should I take when staining my deck?
Wear protective gear such as gloves and goggles especially if using products containing chromated copper arsenate which has arsenic in it; keep your work area well-ventilated; follow all product instructions carefully to avoid mishaps.